
Callisto Protocol: Aftermath
This guide provides information on Chapter 2 of the Callisto Protocol game, which is called Aftermath. It includes details on how to obtain the pistol, Skunk gun, and GRP glove, how to reach the medical unit, survive the battle in the SHU, escape the basement, and avoid the blade trap.
This page of the Callisto Protocol guide offers a walkthrough for the second chapter, Aftermath. The walkthrough provides guidance on how to acquire the BI-55 pistol at the ReForge, obtain the Skunk Gun schematic, locate the medical facility, use the GRP on enemies, escape the basement, survive the battle near the SHU control room, defeat the security robot, and avoid the blade trap en route to the exit.
- Find Elias in security
- Print a weapon at the ReForge
- Locate the Medical Facility
- Find a guard’s corpse
- Reach the back exit
- Look for an elevator
- Find a way out of the basement
- Reunite with Elias
- Restore power
- Survive until SHU Control Door opens
- Locate the SHU Control Room
- Take elevator down to the cell
- Reach the Tram Station
- Exit the station
Find Elias in security

The second chapter begins shortly after the confrontation with Captain Ferris in the watchtower building. Follow the corridor to Overbridge D503.
Be wary of a jump scare, as there is a monster to defeat here. Once it is defeated, open the door to Checkpoint D521 and squeeze through to Access Hall D573. A cutscene will play involving escape from monsters and meeting Elias.
Print a weapon at the ReForge

Search the area for optional loot in cabinets and drawers, or follow Elias right away. In the security room, Elias will give you a weapon fragment.
You can use the first Reforge to purchase the BI-55 pistol for 800 credits, which can be found in a large chest next to the ReForge.
In this and subsequent Reforges, you can also:
- Sell accumulated loot to free up inventory slots;
- Upgrade equipment by purchasing upgrades for melee and ranged weapons with credits;
- Buy supplies (as a last resort, as there are plenty of them to find in the world).
Locate the Medical Facility
Choose Access Hall D571. Upon reaching Access Hall D554, you will encounter a monster and can try out your new firearm. Reach Lift D513.

On the new floor, you have the opportunity to perform a stealth attack by crouching, approaching the monster from behind, and stabbing it with the shiv. Once the monster is defeated, climb the stairs.

Upstairs, you will encounter your first acid-spitting monster. Strafe left and right to avoid getting hit. If you end up in melee combat, you can fire your pistol between baton attacks by quickly aiming and firing after the blue icon appears.
To access the ventilation shaft, choose Recreation A225 and use stealth attacks to eliminate the two monsters. If you must engage in combat, take them out one by one. In order to enter Laundry B202, you will need a Keycode. Return to the area where you encountered the damaged robot and interact with the corpse to obtain the access code. You can also collect implants from bodies if you choose. Be cautious, as one of the monsters may be playing dead. There are two paths to take: the right passage leads to optional areas with collectibles, while the left passage is the main path. Workshop B415 can be accessed with a shiv and leads to new optional areas. Maintenance B414 is the main path that leads to Medical Ward C101. In Operating C104, you can acquire the GRP glove, which allows you to grab objects and enemies. The glove consumes energy, but you can find battery packs to replenish it. After defeating monsters, place the Gate Fuse in the fusebox to unlock the passage to Med Office C105. Supply C107 offers a ReForge where you can upgrade your GRP. To continue, choose Med Observation C108 and proceed to Maintenance C110. Look for an elevator and be wary of monsters that emerge from cocoons in the basement.
- When grabbed, press the indicated button (Triangle/Y on consoles) to free yourself.
- To avoid losing health or dying, destroy cocoons from a distance.
Escape the basement

Remember the Gate Fuse needed for the locked pathway (D3 Basement). Destroy cocoons and kill monsters along the way. Use GRP to grab an explosive canister and throw it at two or more creatures. Pick up the Gate Fuse and return to D3 Basement to place it in the box. Unlock the optional area to find the Skunk Gun schematic. Use the Fuse to open SHU Access D303 and leave the basement.
Find Elias

Follow the balconies to SHU Command D701. Go to the gondola and buy the Skunk Gun at the new ReForge. Activate the gondola and kill monsters with GRP or firearms.
Restore power
Gather ammunition and GRP batteries. Pick up 2 Gate Fuses and place them in the upper balcony boxes.
Survive until SHU Control Door opens

Defeat waves of monsters and use GRP to throw them at working machines. Watch out for Jacob and recharge the GRP energy when needed. Use firearms and melee weapons to finish off larger monsters.
Locate the SHU Control Room

After defeating all monsters, open the door to SHU Control D705 and kill the crawling beast.
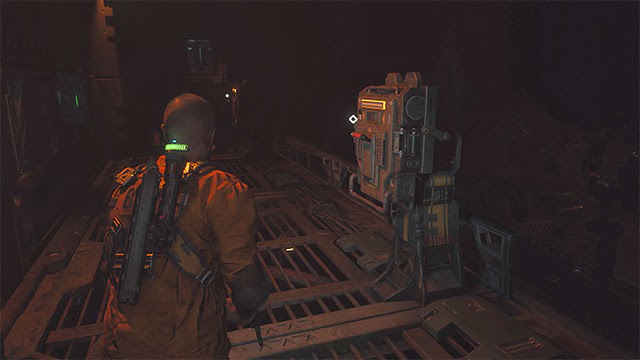
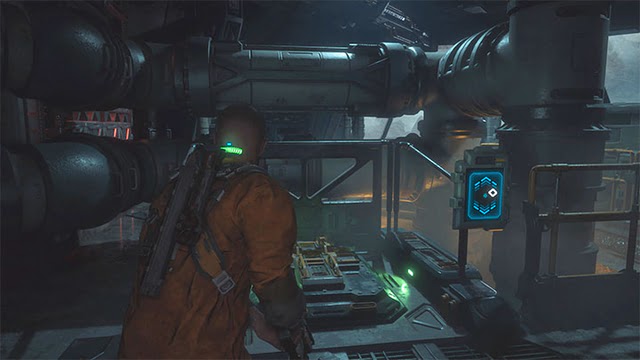
If you go upstairs, you can choose to use a Reforge. Eventually, you will need to check out the interactive console in the picture.
Take the elevator down to the cell

Head back to the lower level and unlock SHU Cell Wing A. Once you use the elevator, a group of monsters will appear. You can either try to sneak up on one of the monsters or use the GRP to throw them into the chasms.
After the fight is over, find an interactive console near one of the cells (screenshot). Activate it to start a cut-scene. There is a collectible waiting for you on the table. Use the Shiv to escape the cell.
Reach the Tram Station
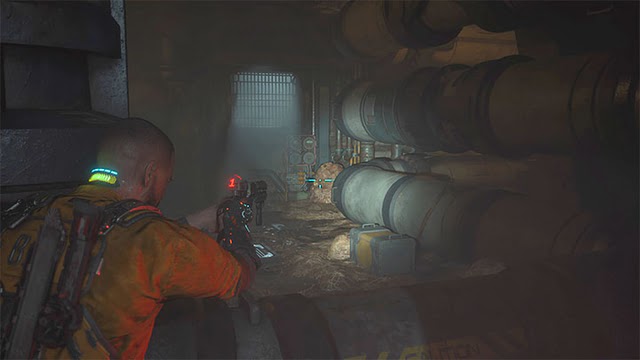
After crawling through the ventilation shaft, you will arrive at a new location and start by defeating the monster. Continue to follow the narrow pathways between the pipes.
Be careful of cocoons (the exemplary cocoon is shown in the screenshot – it’s best to destroy them from a distance) and small monsters – kill them quickly with melee attacks or throw them off you (quickly press Triangle/Y). Reach the ladder and go down.
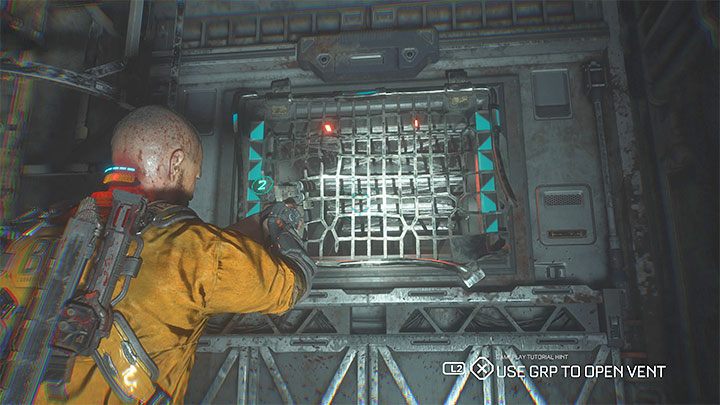
Use the GRP to rip out the bar from the screenshot. This way, you can access a new ventilation shaft. Once you reach the other side, defeat the monster and go right.
This area is patrolled by a security robot – start sneaking and follow the linear path.

There are two ways to proceed:
- Destroy the robot – hide behind cover, leave at an opportune moment, and fire at the robot’s head. It’s best to use the Skunk Gun – two hits should suffice. The robot will drop a decoder (you can sell it for 500 credits at the nearest ReForge).
- Sneak past the robot – take a moment to observe the robot’s route and sneak behind it. Keep going straight after the robot turns left.
Exit the station
Get rid of the new monster (quickly, if the robot is still active) and reach the ventilation tunnel.

The plan in the corridor with the bladed trap is as follows:
- After the trap starts moving, hide in the side area.
- If any monster starts approaching you, hit them with the pistol to stop them for a while. The trap can easily kill all monsters here.
- In the final side area, activate the trap, hide, and quickly run up to the ventilation shaft.
After leaving the shaft, approach the large window – in the distance, you will notice a residential habitat, which will be your new destination.
In the same room, you can use the panel to open the hatch. Go down the ladder to complete this chapter and proceed to the new one – Habitat.
FAQ
What is Callisto Protocol: Aftermath?
Callisto Protocol: Aftermath is an upcoming survival horror game developed by Striking Distance Studios. Set in the year 2320 on Jupiter’s moon Callisto, the game follows a group of prisoners who must survive against various monsters and hostile forces while trying to escape the island they are trapped on. The game is being designed to be a spiritual successor to the Dead Space series, with former Dead Space developers working on the project.
What can players expect from Callisto Protocol: Aftermath?
Players can expect a tense and terrifying survival horror experience in Callisto Protocol: Aftermath. The game is being designed to be a true horror game, with limited resources, a claustrophobic setting, and deadly enemies. Players will need to scavenge for supplies, craft weapons and tools, and use their wits to survive the numerous threats they will face. The game will also feature a rich story and characters, with a focus on immersive storytelling and world-building. Overall, Callisto Protocol: Aftermath is shaping up to be a thrilling and intense horror experience for fans of the genre.

James, a young and enthusiastic gamer. With a passion for gaming, he personally plays and experiences the games he writes about, providing authentic and insightful content to fellow gamers.