
In Shadow of the Tomb Raider’s Peruvian Jungle location, there are two Challenge Tombs located on the eastern side of the map. One is at the northern end while the other is at the southern end. To complete a Challenge Tomb, you must read the inscriptions on the shrine and fulfill its strict requirements, which will, in turn, give you special skills.
This page provides information about the Challenge Tombs in Peruvian Jungle and what to do to reach the shrine. It also outlines the skills that are awarded for completing each particular Challenge Tomb.
- First Challenge Tomb – Underworld Gate
- Second Challenge Tomb – Judge’s Gaze
First Challenge Tomb – Underworld Gate

As you progress through Shadow of the Tomb Raider’s storyline, you will come across the first Challenge Tomb in the Peruvian Jungle. It is located on the south-eastern edge of the map, and its icon will appear once you get close or reveal the map. Maps showing points of interest can be found in leather backpacks scattered around the map in caves.
Upon entering the tomb, you will encounter a pool that cannot be jumped into. To cross it, climb a tree branch and jump onto the climbable wall on the right.

On the other side of the cave, you will encounter a path full of traps. Be careful and disarm whatever traps you can. Follow the wall on the right to reach another cliff.

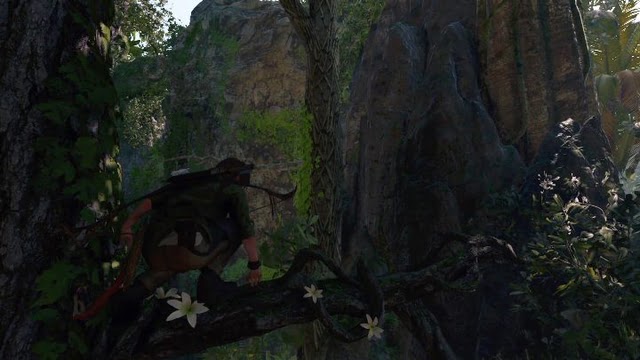
The cliff can be crossed using trees. Once on the other side, anchor yourself on the wall using the climbing axe, and rappel down using the rope. Swing a bit, and use the momentum to jump onto a stable rock ledge. Repeat the same procedure a bit further until you clear the cliffs.

Once you clear the cliffs, you will find a campfire. From here, there is a passage through the rocks on the right. Squeeze through and proceed to the next location. Then jump through the window on the right to get into the open.

When you are in the open, head left, climb the rocks, and rappel down using the rope. Lower yourself as much as you can, swing, and jump onto a nearby rock ledge.

From there, climb on a branch, jump, and throw your grapple axe to gain the momentum necessary to cross.

On the other side, you will encounter a puzzle. First, move a large mechanism so that the reel with rope is lined up with the wooden bridge. Then, stand near the rope and shoot a rope arrow on the other side. This will enable you to cross to the other side.

Upon arrival, cut the rope and approach the ancient mechanism. Take hold of the moving element and shift it. You have just activated an ancient crane, which will bring a crate for you to return to the other side. Jump over the crate and head back to the first mechanism.

Shift the mechanism once more, then use the rope to connect the crate and the mechanics. Once connected, return to the other side and move the crane’s arm. This will cause the crate to swing – jump onto it, then from there reach the nearby rock shelf.

On the other side of the cave, you will find an area covered in secrets and materials. Take what you need, then proceed forward. You will have to jump onto a rock shelf, which will break apart. Lara will fall, but she will hold onto another shelf. From there, jump onto the rocks and use them to climb up the mountain. Watch out for sharp traps that may fall from above and instantly kill the heroine while climbing.

The shrine is located at the top. Once activated, you will unlock the Eagle’s Perch skill, which increases your climbing speed.
Second Challenge Tomb – Judge’s Gaze

In accordance with the plot of Shadow of the Tomb Raider, you will encounter your second challenge tomb in the Peruvian Jungle on the northeastern edge of the map. The challenge tomb icon will appear when you get close or reveal the map. To reach this tomb, you’ll have to swim a bit, but there are no enemies in the water.

To enter the location, you’ll need to break some rocks that block the entrance. Once inside, you’ll see a cliff. You can either jump straight into the water or use your climbing axe to jump across to the other side. Both actions will result in Lara being unable to hold onto the wall and slipping into the water, but she won’t lose any health points.

After getting out of the water, you’ll encounter a blocked passage. To proceed, jump onto the lift (marked in grey). The statue (violet) will be lifted, revealing a passage.

On the other side, you’ll encounter a puzzle. Your task is to lift the destroyed element using the stone statues and carts.

Jump down and move both carts. One should be placed under the destroyed object, the other where the first one was. Once done, shoot a rope arrow to attach the rope to the statue and the left side of the destroyed element.

Once you complete this part of the puzzle, climb higher and jump down onto the lift. This will lift the statue along with the element of the structure.
The first step is to move the initial cart to the opposite side once the section is raised. Then, join the two pieces displayed in the screenshot. Your next objective is to ascend to the higher level and operate the lift, which will elevate the entire structure and allow you to continue. To arrive at the shrine, simply leap over to the other side. This will grant you access to the Caiman’s Heart ability, which boosts your health regeneration.
FAQ
What are Challenge Tombs in Shadow of the Tomb Raider Game?
Challenge Tombs are optional puzzle-filled dungeons to explore in Shadow of the Tomb Raider Game. Players can earn rewards such as skills, weapons, and outfits by solving the intricate puzzles hidden within these tombs.
Where are the Peruvian Jungle Tombs located in Shadow of the Tomb Raider Game?
The Peruvian Jungle Tombs are located in the first region of Shadow of the Tomb Raider Game. There are three Challenge Tombs in this region: Underworld Gate, Judge’s Gaze, and Howling Caves. Each tomb has its own unique puzzle mechanics and themes, providing players with a variety of challenges to overcome.

James, a young and enthusiastic gamer. With a passion for gaming, he personally plays and experiences the games he writes about, providing authentic and insightful content to fellow gamers.