
List of Endings in NieR Automata
This guide contains a list of all 26 game endings in NieR Automata. The endings are divided into three categories: main, minor, and hidden. We have provided specific requirements and instructions on how to unlock each ending, including the secret Y ending, which involves defeating a strong, hidden boss.
While our guide does contain some spoilers regarding the circumstances of unlocking the endings, we have tried our best to avoid revealing any crucial plot points related to the main endings and the conclusion of the game.
- General information about the endings
- Ending A – flowers for m[A]chines
- Ending B – or not to [B]e
- Ending C – meaningless [C]ode
- Ending D – chil[D]hood’s end
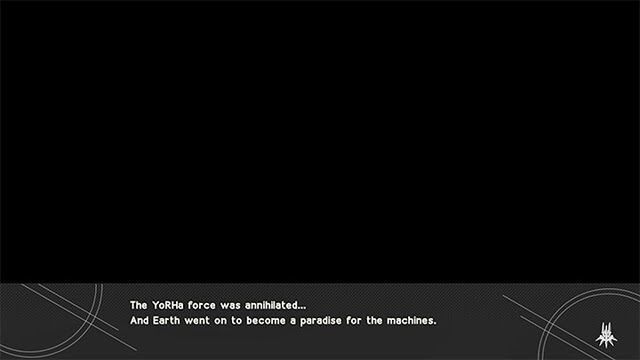
- Ending E – the [E]nd of yorha
- Ending F – mission [F]ailed
- Ending G – hun[G]ry for knowledge
- Ending H – a mountain too [H]igh
- Ending I – no [I] in team
- Ending J – bad [J]udgement
- Ending K – aji wo [K]utta
- Ending L – [L]one wolf
- Ending M – break ti[M]e
- Ending N – [N]o man’s village
- Ending O – just y[O]u and me
- Ending P – corru[P]tion
- Ending Q – [Q]uestionable actions
- Ending R – mave[R]ick
- Ending S – city e[S]cape
- Ending T – fa[T]al error
- Ending U – deb[U]nked
- Ending V – reckless bra[V]ery
- Ending W – broken [W]ings
- Ending X – time to rela[X]
- Ending Y – head[Y] battle
- Ending Z – over[Z]ealous
General Information About the Endings
The endings in NieR Automata can be divided into three categories: main, minor, and hidden. The main endings are the ones that appear when you complete Routes and meet additional requirements. There are five main endings: A, B, C, D, and E. A separate trophy can be earned for each of them.
The remaining 20 endings are minor endings that can be unlocked as you progress through the game. They can be obtained by failing to meet specific quest objectives, such as killing allies or ignoring a message asking for help. Each time you unlock a minor ending, the game will display a short comment related to the ending, and you will be able to continue the game from the latest save once you return to the main menu. We recommend saving the game before unlocking each additional ending to minimize any progress lost in a given quest.
In addition to the main and minor endings, there is a major hidden ending Y that involves facing off against a very strong boss. We have included instructions on how to unlock it in the following table.
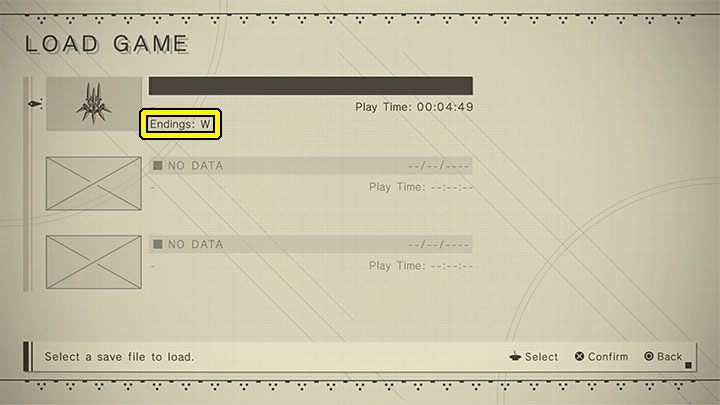
Each ending you obtain is saved on your current save file. You can check the status of the endings you’ve unlocked in the save game selection menu – they are displayed in the Endings section, each symbolized by a different letter of the alphabet.

Don’t worry if you miss some endings in the game. Once you finish all 17 chapters for the first time, you can access the Chapter Select option from the main menu or pause menu to replay any chapter and obtain any missed endings. Your progress towards unlocking endings is retained.
For example, if you want to revisit section 01 of chapter 03, use the Chapter Select option. There are several main endings, including:
Ending A – flowers for m[A]chines
Complete Route A, the 10 chapters as 2B, to unlock this ending.
Ending B – or not to [B]e
Complete Route B, the 10 chapters as 9S, to unlock this ending.
Ending C – meaningless [C]ode
Complete Route C and D (played in parallel) and side with A2 at the end of Chapter 17 to unlock this ending.
Ending D – chil[D]hood’s end
Complete Route C and D (played in parallel) and side with 9S at the end of Chapter 17 to unlock this ending.
Ending E – the [E]nd of yorha

This ending is considered the true ending of the campaign. To unlock it, first unlock endings C and D. When the credits roll after seeing ending C or D, agree to the pod’s request and participate in the end credit battles. Detailed instructions are on the Route C and Route D Endings page of our guide.
Ending F – mission [F]ailed
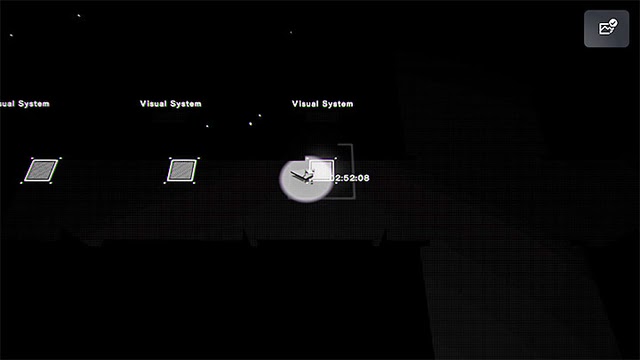
Unlock this ending in chapter 01-03, Route B. Ignore the option to interact with the white squares in the 3-minute system restoration section while playing as 9S in Chapter 1.
Ending G – hun[G]ry for knowledge

Unlock this ending in chapter 01-01, Route B. Walk to the end of the crane while controlling 9S in Chapter 1 to trigger a warning and unlock the ending.
Ending H – a mountain too [H]igh

Unlock this ending in chapter 05-02, Route A or Route B. Choose the second exit from the Machine Village (pictured above) instead of returning to the City Ruins after receiving a message about an attack on the City Ruins during the first visit to the Machine Village in Chapter 5.
Endings in NieR: Automata

There are several secret endings that can be unlocked in NieR: Automata by completing certain tasks in different chapters of the game. Each ending is marked by a letter, from I to P. Here are the requirements for each ending:
Ending I – no [I] in team
To unlock this ending, you must defeat the boss in the Copied City during Chapter 8 and then leave 9S to his fate by heading in the opposite direction.
Ending J – bad [J]udgement
To unlock this ending, attack any of the neutral machines in the first room of the Abandoned Factory during Chapter 9.
Ending K – aji wo [K]utta
To unlock this ending, consume the Mackerel given to you by Jackass at the Desert Camp during Chapter 6 and fatally poison your character.
Ending L – [L]one wolf
To unlock this ending, ignore 2B’s warning and quickly head back to the Resistance Camp’s exit during the attack by hostile machines in Chapter 10.
Ending M – break ti[M]e
To unlock this ending, head in another direction instead of going to Pascal’s village during Chapter 14 while playing as A2.
Ending N – [N]o man’s village
To unlock this ending, attack and eliminate all the machines in Pascal’s village during Chapter 7.
Ending O – just y[O]u and me
To unlock this ending, ignore the objective to destroy the machines from the ruins in Chapter 11 and head in the opposite direction to the Abandoned Factory.
Ending P – corru[P]tion
To unlock this ending, complete Chapter 11 and wait for the ending to play after receiving a warning.
The last part of Chapter 11 allows you to control 2B while she is infected. Your objective is to head towards the mall in order to speed up the infection process, but stop just after crossing the bridge and let the infection reach 100%. Avoid triggering the cut-scene with A2 by not going any further, otherwise, you will miss the chance to get the ending.
Ending Q – [Q]uestionable actions can be unlocked in chapter 11-07, Route C/D. You can unlock this ending soon after obtaining the P ending. After completing the section with 2B, you will take control of 9S. Instead of running to the mall, head in another direction, for instance, to the Resistance Camp or the Flooded City. You will receive a warning about deviating from the path, and soon after, the ending will play.
Ending R – mave[R]ick can be unlocked in chapter 14-05, Route C/D. While playing as A2 in the final part of Chapter 14, you will reach the Abandoned Factory. Once you enter the first room from the screenshot, attack any of the neutral machines.
Ending S – city e[S]cape can be unlocked in chapter 17-01, Route C/D. This ending can be obtained during the failed first attempt to break into the central Tower in Chapter 17. Instead of attempting to hack the tower, start moving away from it (and from the fighting twins). You will receive a warning and soon after, an ending will play.
Ending T – fa[T]al error can be unlocked in chapter 01-05 and all subsequent ones. This ending can be obtained by removing the operating system chip from the Android you are controlling. To do this, open the Skills menu and select the Destroy Chip option. Find the OS Chip at the top of the list of installed chips, select it, and confirm your choice to remove it.
Ending U – deb[U]nked can be unlocked in chapter 01-05, Route A or Route B. To get this ending, 2B or 9S needs to self-destruct during one of your stays in the Bunker. Hold down the L3 and R3 sticks and wait for about 2 seconds for the countdown to end. The exploding Android will also destroy the Bunker.
Ending V – reckless bra[V]ery can be unlocked in chapter 17-01, Route C/D. This ending can be obtained during the failed first attempt to break into the central Tower in Chapter 17. Instead of hacking the tower, join the twins and take part in destroying the endlessly appearing machines. Fight until enough time passes, and the game will play the ending concerning the failed Tower infiltration attempt.
Ending W – broken [W]ings can be unlocked in chapter 01-01, Route A.
To unlock the first alternative ending, known as Ending X, deliberately destroy the Flight Suit you are controlling during the first Flight Suit section in Chapter 1. You must allow the enemies to hit you while positioning yourself in the line of fire of large red streams of energy. This ending can also be unlocked in chapter 11-06, Route C/D, by moving away from YoRHa soldiers in 2B’s location and leaving her to her fate.
The game’s most complex additional ending is Ending Y, also known as the Head Battle. This ending requires the player to win a level 99 boss fight and meet several requirements to be well-prepared. To prepare for this ending, complete all the Routes and attempt to reach at least level 90. It is also advisable to collect as many experience points as possible by eliminating golden opponents, completing quests, and participating in battles with increasingly powerful opponents in optional arenas.
The player should also obtain all the available weapons and upgrade them to the highest level 4, except for Emil’s Heads, which is the reward for defeating the boss in this ending. To do this, the player needs a large amount of crafting ingredients. The player should also meet Emil the Merchant, complete the Emil’s Memories quest, and talk to Emil to find out where he lives.
If the player has completed all of the above, they should use the Chapter Select option to go to Chapter 7 in Route B, playing as 9S, and ensure that the machine invasion has already occurred in the City Ruins.
To reach your destination, the large crater with a water-leaking hole marked on the screenshot, you must navigate through the central part of the ruins by jumping on platforms, dashing, and launching yourself from the pod. Once there, you’ll find a hidden elevator that leads to the caves under the city. While in the caves, you have the option to attack or ignore the machines you encounter. Eventually, you’ll need to freefall to the final section of the caves. From there, explore even deeper into the caves to reach Emil’s hideout. If you’ve met all the requirements, the entrance will be open, and you can enter and steal the mask you need. You’ll then need to use it to defeat Emil, a level 99 boss, to obtain the Emil’s Heads unique weapon. You must upgrade it to level 4 and complete the Emil’s Determination side quest in the desert. Finally, in chapter 14-01, Route C/D, you’ll have the option to save Pascal from the machines and then select the dialog option to destroy Pascal during the conversation.
FAQ
What are the different endings in NieR Automata?
In NieR Automata, there are a total of 26 endings that players can unlock. These endings are divided into five main categories: A, B, C, D, and E. Endings A and B are the primary endings that players will experience as they play through the game’s main story. Endings C through E are referred to as the game’s “true” endings and are unlocked by completing additional objectives after finishing the main story.
How do I unlock the true endings in NieR Automata?
To unlock the true endings in NieR Automata, players must complete specific objectives after finishing the main story. Ending C is unlocked by completing all of the side quests in the game, ending D is unlocked by completing the game again after selecting a specific option during the credits, and ending E is unlocked by completing a specific sequence of events after choosing to sacrifice your save data for the sake of another player.
Do I need to play through the game multiple times to see all of the endings?
Yes, players will need to play through the game multiple times to see all of the endings in NieR Automata. Endings A and B are experienced during the first playthrough, while endings C and D are unlocked during subsequent playthroughs. Ending E is only available after completing the game multiple times and fulfilling specific requirements.

James, a young and enthusiastic gamer. With a passion for gaming, he personally plays and experiences the games he writes about, providing authentic and insightful content to fellow gamers.