
NieR Automata: Chapter 10, Ending A, Route A – guide
In this guide for NieR Automata, we will provide a walkthrough for Chapter 10 of Route A – Completion A. You will discover how to survive the attack on the Resistance Camp, defeat Eve, the final boss of Route A, unlock the first major ending of the game, Ending A, and more.
- Weird Machines – returning to the Resistance Camp
- Mini-boss – mechanical spider
- Eve – the first fight
- Threat Disposal – reaching Pascal’s village
- Eve the final boss – the first stage of the fight
- Eve the final boss – the second stage of the fight
- Eve the final boss – the third stage of the fight
- Completing Route A and proceeding to Route B
Weird Machines – returning to the Resistance Camp

To start the final chapter of Route A, you need to escape the Abandoned Factory successfully. Save your game at the Access Point in the factory. Next, go to the Resistance Camp. Here, you will receive a call for help and must reach the safe house on your own, as the Access Point is not available.
When you get to the Resistance base, you will see machines attacking the rebels. You can unlock the hidden ending L by ignoring the dying members of the resistance and withdrawing from the camp immediately.

When you return to the Resistance Camp for the second time, start fighting the machines. It is best to use area attacks in the central part of the camp. After defeating the first group of machines, explore the back of the camp, where the camera switches to the side view. There, you will encounter more machines, and the last one will be a slightly stronger goliath.
After the fight, go back to the main part of the camp and talk to Anemone.
Mini-boss – mechanical spider

During your conversation with Anemone, a large machine will appear outside the camp. It is another mechanical spider.
The best strategy in this fight is to attack from a distance, as the spider can generate discharge around itself and hit the ground with its legs, creating small shock waves. Ranged combat will make it easier to survive in both cases.

The giant spider has ranged attacks, shooting regular projectiles and larger energy streams. You should dodge to the side in both cases.

Only attack the spider in melee if it is stunned, as this leaves it defenseless for a short time. This will allow you to quickly reduce its health points.

Smaller enemy machines may join the battle, but it’s best to focus on eliminating the main enemy quickly. During the final stage of the fight, the spider will transform into a ball, much like during the Abandoned Factory fight, and you must use melee weapons to attack it.
After defeating the spider, Eve will appear. The first, shorter fight against this opponent will take place.
The First Fight Against Eve

Eve will transform into a large spinning ball of machines. It’s safest to avoid direct contact and attack the boss from a distance to cause more machines to fall off the ball over time.
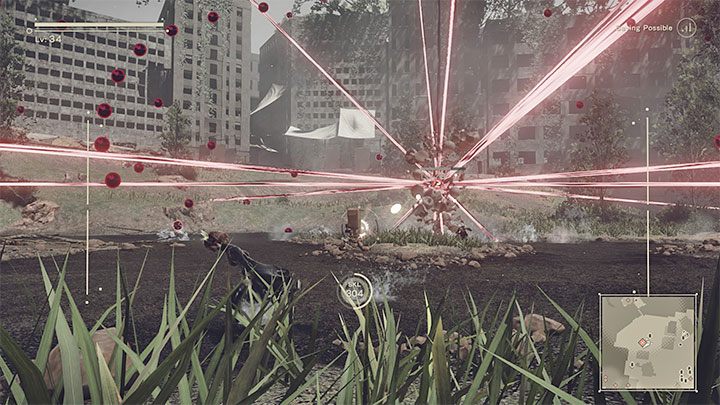
In the next stage of the fight, you will face Eve directly. The boss can levitate and attack from a distance using groups of projectiles and red energy streams. Ranged attacks are effective, but melee combat is riskier.
Fight until the boss’ health bar drops to zero. You won’t be able to defeat Eve permanently, but you’ll complete the next objective.
Disposing of the Threat – Reaching Pascal’s Village

Listen to the radio call and head towards Machine Village. You can’t fast travel, so you must reach Pascal’s village from the City Ruins side. At the barricade, you’ll encounter a group of opponents that you must eliminate.

A mechanical centipede will participate in the fight, attacking from the air. Focus on avoiding the red energy streams and attack its weak spot with ranged attacks.
After winning the battle, you’ll talk to Pascal and learn of Eve’s location. You must go to the central part of the City Ruins. Fights along the way are optional. The final battle against Eve will begin once you reach the area.
The Final Battle Against Eve – First Stage

Eve is the final boss of Route A and the battle is longer than the one in Chapter 10. Keep your camera locked on the boss as the limited field of vision may make it difficult to spot them on your own.
In the area where you face Eve, you can find the bodies of other players if you’re playing online with Network Features enabled. Revive them to gain an extra ally and distract the boss more effectively.

In the initial phase of the fight, Eve will fight in melee. If you’re comfortable with dodging, use a melee weapon. Otherwise, use ranged attacks to weaken the boss.
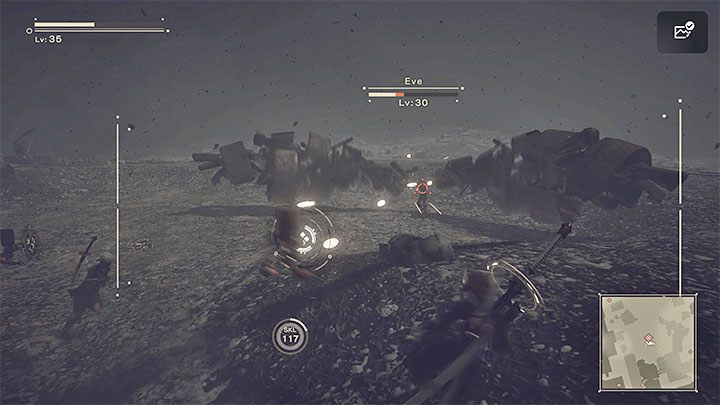
Be cautious of Eve’s bigger melee attacks, such as trying to crush 2B with his “upper limbs” as shown in the screenshot above, and his attempts to grab the controlled character during hit exchanges. Avoiding them with well-timed dodges can save you from taking damage.


After some time, the boss will move to the upper levitating platform. You can attempt to reach him by jumping on nearby lower platforms, but expect the boss to attack you from range while climbing. These attacks are difficult to dodge while focusing on jumping, so perfect dodging is required.
If you manage to reach the boss’ platform, you can further weaken him with attacks. Falling down too many times will result in advancing to the next stage of the battle without the opportunity to easily weaken Eve.

Fight until Eve is surrounded by a sphere and regains his entire health bar. This cannot be prevented and is a part of the fight.
Eve the final boss – second stage

Reviving another player is recommended, especially if your previous sidekick has died due to the boss’ attacks or staying active for too long. 9S will focus on hacking the boss and will not actively help you in weakening Eve with standard attacks.
The boss’ skill range remains the same as in the first stage. Deal with his various melee attacks and weaken him faster.
Eve the final boss – third stage

After weakening the boss enough, a cutscene will show 9S attacking and the last stage of the battle will begin. The boss will levitate and attack with large groups of projectiles. Run to the sides and dash if necessary, while attacking the boss at a distance and locking the camera on him to avoid missing with standard attacks and offensive pod programs.

At the end of the battle, 2B will take unavoidable damage and can only use ranged attacks. Line up between the flying projectiles and focus on ranged attacks.

The boss will be severely weakened and approaching the kneeling Eve will result in the final blow to the boss.
Completing Route A and moving to Route B


Ending A will be displayed after beating the boss, which marks the main ending of Route A.

After the end credits, save your game when prompted.
Once you have gone back to the main menu, click on Continue and choose the save file that you made earlier. This will enable you to resume your game and move on to Route B, as outlined in the following section of the guide.
FAQ
1. What is the objective of Chapter 10 in NieR Automata?
The objective of Chapter 10 in NieR Automata is to complete the mission “Ruler of the Sky” by defeating the Goliath-class machine. This boss fight takes place in the desert area and can be challenging. It is recommended to upgrade weapons and level up before attempting this mission.
2. How do I unlock Ending A in Route A?
To unlock Ending A in Route A, players must complete all main story missions up to the end of Chapter 17. The player will then be prompted to make a choice that will determine the ending. Choosing to sacrifice 9S will result in Ending A.
3. What are the recommended levels for Chapter 10 in NieR Automata?
The recommended levels for Chapter 10 in NieR Automata are between 40-50. It is important to level up and upgrade weapons to have a better chance of defeating the Goliath-class machine. Players can also complete side missions and explore the world to gain experience and level up.
4. What are some tips for defeating the Goliath-class machine in Chapter 10?
One tip for defeating the Goliath-class machine in Chapter 10 is to focus on its legs first. This will cause the machine to fall and expose its weak point. Dodging and using ranged attacks can also be effective. It is important to keep moving and avoid its attacks. Using healing items and chips that increase defense can also be helpful.
5. What happens after completing Ending A in Route A?
After completing Ending A in Route A, players will unlock Route B. This route will have new cutscenes and dialogue, as well as some changes to the gameplay. Players will control a different character and experience the story from a different perspective. It is recommended to play through Route B to unlock additional endings and fully experience the game.

James, a young and enthusiastic gamer. With a passion for gaming, he personally plays and experiences the games he writes about, providing authentic and insightful content to fellow gamers.